Installation

The program is delivered as a standard Windows installation package. You download it from our website (demo version) or through a link we provide with a mail (in case of purchase). Check here for your options.

Installing the executable and built-in content

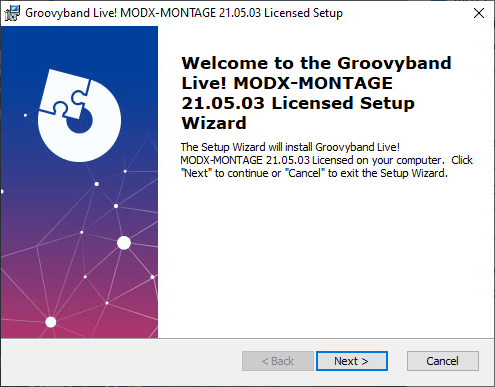
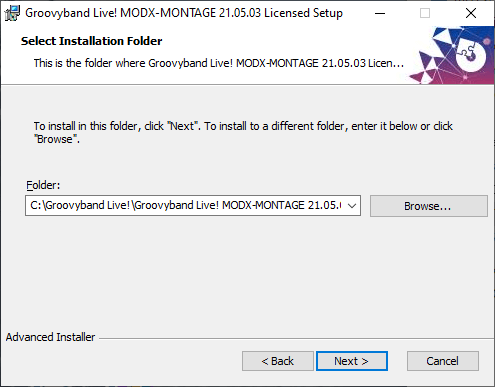
Once the package has been downloaded to your hard disk, just click on it to run the installer. You will be presented with a first dialog (see below) and then with a second dialog requiring you to specify the installation folder.

Software installer.
Software installer.

The preselected default contains in the folder name the edition and version number, and hence will allow you to install many editions/versions in parallel without interference.

The preselected default should be OK for most cases, but you are free to change it (with some caveats, see later). The installation program will ONLY write in that folder and will NOT touch anything else in your computer (except the launch icon placed on your desktop). Therefore to uninstall the software you just delete that folder and the launch icon(s) on your desktop.

The installer will create on the desktop two launch icons: for MODX and for Montage (check their name). Each icon will launch the program with the appropriate command line arguments to instruct it to output sysex messages appropriate for the target synth. If you want you can delete the one you do not need.

In case you need to create your own launch icon, the supported switches (to be passed to the command line) are:

  • /MODX

  • /MONTAGE

Example of command line (with path to executable file omitted for clarity): groovyband.exe /MODX

Administrator privileges

This topic is for advanced users that know what they are doing. If you do not understand what the following explanation means, just ignore it and stick with the default.

The software during normal operations needs to write into its installation folder. If you choose a path within a system reserved folder (i.e. the one where all Windows programs are normally installed: C:\ProgramFiles\), the program must run with administrator privileges. This is a requirement enforced by Windows operating system.

The shortcut (icon) the installer creates on your desktop does NOT launch the program with the required privileges. You have to edit it yourself and enable “Run as Administrator”.

We do NOT recommend this route. If you install the software elsewhere (for example where the installer default option suggests) you do not need to run it with administrator privileges.

Minimum HW and SW requirements

  • Dual core CPU @ 1 GHz

  • Windows 10 – 64 bits

  • Virtual machines are NOT supported

For non techies: EVERY Windows machine on sale today, and in the last few years as well (no matter how humble and underpowered it is), is OK!

Installing the Style packs

This section only applies to paid versions of the software. The Demo version does not support any style pack.

The pack is delivered as a zip file. It can be opened with Windows File Explorer, like any folder.

Within the pack there are 2 subfolders: PRST STY and ROM. Subfolders with the same name can also be fond in the program installation folder on your hard disk.

To install the pack you have to copy the pack subfolders' content into the corresponding (= same name) program subfolders.

Here are the steps:

  • Locate the Groovyband Live! installation folder in your hard disk (usually somewhere within C:\Groovyband Live!). If you do not know where it is, you can inspect the properties of the launch icon on your desktop.

  • Open the installation folder with the File Explorer and locate the ROM and PRST STY folders contained there.

  • Open the Expansion Pack zip file with the File Explorer (possibly using another instance) and copy the content of PSRT STY and ROM folders into the corresponding folders on your hard disk (those you located in previous point). Do NOT copy the folders, just the files within!

  • Optionally you can arrange the style files into the PSRT STY folder as you like (create subfolders, move around, duplicate, rename, ....). You can also possibly copy them into the USER STY folder.

To actually use the style pack(s) you still nedd to license them.

Obtaining and installing the license file(s)

This section only applies to paid versions of the software. The Demo version does not require any license file.

Once you have purchased the software you will receive an email with the download links of the product(s) you have bought. Proceed with the download and install the software as explained earlier.

License terms

The software is licensed to run on a single machine. And hence once activated for that given machine it cannot be used elsewhere.

Each machine is uniquely identified by a "machine-ID" which is generated and displayed by the Demo version of the software. You therefore have to install the Demo on the machine you intend to activate the commercial version on.

The license can later be transferred to another machine. However this transfer is subject to:

  • Good faith clause.

  • A small administrative fee.

So choose wisely where to activate the software. You can again download the Terms and Conditions we already showed you, and you already agreed-upon, when you proceeded to checkout.

The software is still locked and needs to be licensed. To obtain the license files follow these instructions:

  • If not already done, install the demo version on the same machine you want to use the purchased commercial version of the software. Launch the demo version and right from the splash screen copy the machine-ID code (use the COPY button, as shown in the image here below). The ID is now in the Windows clipboard, and from there can be pasted anywhere.

    Machine-ID on splash screen.
  • Reply to the email you received with the download links. Just paste the machine-ID. No need to write anything else.

  • Wait for our answer. Your email will be processed manually (so be patient, up to 2 working days might be necessary), and finally you will get your license files.

Once you have got your license files, one last step is needed: install them. Follow these instructions:

Copy the license file named groovyband.lic into the installation folder, as shown here:

License file in program installation folder.

Copy all the other license file(s), named *.lic, into the ROM subfolder, as shown here:

License file in program ROM subfolder.

Now your software is unlocked.

Uninstallation

To completely remove the program from your computer, you simply have to delete the installation folder (and the desktop icons). Nothing else has been written to your system.