Installation

The program is delivered as a standard Windows installation package. You download it from our website (demo version) or through a link we provide with a mail (in case of purchase). Check here for your options.

Installing the executable and built-in content

Once the package has been downloaded to your hard disk, just click on it to run the installer. You will be presented with a first dialog (see below) and then with a second dialog requiring you to specify the installation folder.

Software installer.
Software installer.

The preselected default contains in the folder name the edition and version number, and hence will allow you to install many editions/versions in parallel without interference.

The preselected default should be OK for most cases, but you are free to change it (with some caveats, see later). The installation program will ONLY write in that folder and will NOT touch anything else in your computer (except the launch icon placed on your desktop). Therefore to uninstall the software you just delete that folder and the launch icon(s) on your desktop.

Administrator privileges

This topic is for advanced users that know what they are doing. If you do not understand what the following explanation means, just ignore it and stick with the default.

The software during normal operations needs to write into its installation folder. If you choose a path within a system reserved folder (i.e. the one where all Windows programs are normally installed: C:\ProgramFiles\), the program must run with administrator privileges. This is a requirement enforced by Windows operating system.

The shortcut (icon) the installer creates on your desktop does NOT launch the program with the required privileges. You have to edit it yourself and enable “Run as Administrator”.

We do NOT recommend this route. If you install the software elsewhere (for example where the installer default option suggests) you do not need to run it with administrator privileges.

Minimum HW and SW requirements

  • Dual core CPU @ 1 GHz

  • Windows 10 – 64 bits

  • Virtual machines are NOT supported

For non techies: EVERY Windows machine on sale today, and in the last few years as well (no matter how humble and underpowered it is), is OK!

Obtaining and installing the license file(s)

This section only applies to paid versions of the software. The Demo version does not require any license file.

Once you have purchased the software you will receive an email with the download links of the product(s) you have bought. Proceed with the download and install the software as explained earlier.

License terms

The software is licensed to run on a single machine. And hence once activated for that given machine it cannot be used elsewhere.

Each machine is uniquely identified by a "machine-ID" which is generated and displayed by the Demo version of the software. You therefore have to install the Demo on the machine you intend to activate the commercial version on.

The license can later be transferred to another machine. However this transfer is subject to:

  • Good faith clause.

  • A small administrative fee.

So choose wisely where to activate the software. You can again download the Terms and Conditions we already showed you, and you already agreed-upon, when you proceeded to checkout.

The software is still locked and needs to be licensed. To obtain the license files follow these instructions:

  • If not already done, install the demo version on the same machine you want to use the purchased commercial version of the software. Launch the demo version and right from the splash screen copy the machine-ID code (use the COPY button, as shown in the image here below). The ID is now in the Windows clipboard, and from there can be pasted anywhere.

    Machine-ID on splash screen.
  • Reply to the email you received with the download links. Just paste the machine-ID. No need to write anything else.

  • Wait for our answer. Your email will be processed manually (so be patient, up to 2 working days might be necessary), and finally you will get your license files.

Once you have got your license files, one last step is needed: install them. Follow these instructions:

Copy the license file named groovyband.lic into the installation folder, as shown here:

License file in program installation folder.

Copy all the other license file(s), named *.lic, into the ROM subfolder, as shown here:

License file in program ROM subfolder.

Now your software is unlocked.

Limit the number of DSPs to those actually provided by your hardware

Depending on the software version you have bought and the keyboard you have, the software might support more DSPs than those actually available in your keyboard. See here below for a more in-depth explanation.

To limit the number of DSPs the program let you use, to match the number of those actually provided by your hardware, you have to launch the program with an appropriate switch.

The supported switches (to be passed to the command line) are:

  • /PSR

  • /SX6

  • /SX7

  • /SX9

  • /SX9-2

  • /TYR

  • /GEN

  • /GEN-2

These switches can be specified by editing the shortcut (icon) created by the installation program on the desktop. Right click the icon and select “Properties” on the popup menu. On the panel that opens, select the “Shortcut” tab and edit the “Target” field.

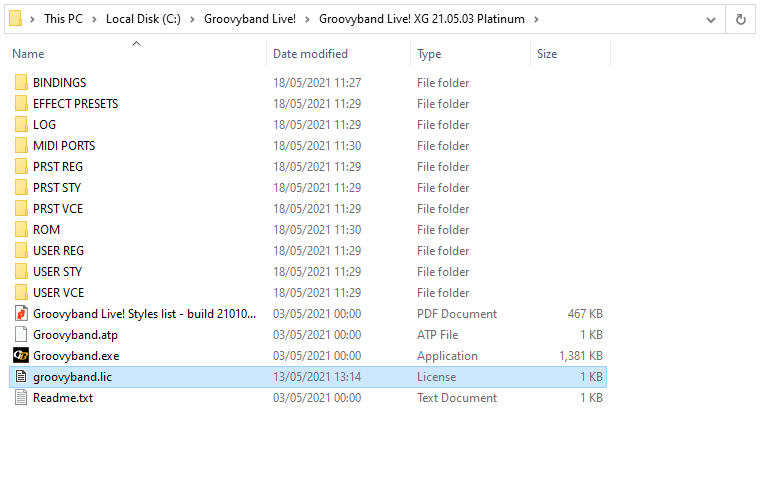
It should contain something like “C:\Groovyband Live!\Groovyband Live! XG 21.05.03 Platinum\Groovyband.exe”. To pass a switch, edit the field and add it after the closing quotes. Here is an example, to let the program know that we want to use it with a Tyros:

“C:\Groovyband Live!\Groovyband Live! XG 21.05.03 Platinum\Groovyband.exe” /TYR

The switches /SX9-2 and /GEN-2 will select the configuration with 2 insert DSPs per part. If you launch the program with no command line switches, it will automatically default to /PSR.

If you attempt to run the program addressing more DSPs than those actually provided by your hardware, you might not hear the DSPs you select on the user interface. This is because the hardware, even if asked to, cannot play DSPs it does not actually have. Even worse (due to the dynamic allocation), you might sometimes hear some of them randomly.

If your license do not support all the DSPs of your hardware (as requested with the command line switch), it will automatically reduce itself to the maximum number allowed.

The demo version can only run in /PSR mode, which is the default. So you do not need to provide any command line switch. And if you do, they will be ignored.

Available insert DSPs

Groovyband manages 16 parts (8 automatic accompaniment parts, and 8 parts you can play by yourself). Each of these parts is like a mixer bus to which you can add insert effects to shape the sound of the playing instruments.

The number of insert effects you can use all at once (and how many in series on a given part) is limited by two factors: what is available in the hardware (PSR, Tyros, Genos) and what Groovyband allows you to exploit of the hardware capabilities (depending on the edition: standard, pro, platinum).

The following table shows the possible combinations (parts x inserts):

Arranger ModelHW DSP #StandardProPlatinum
PSR-S33×13×13×1
PSR-SX 60033×13×13×1
PSR SX 70054×15×15×1
PSR SX 90084×18×1 or 4×28×1 or 4×2
Tyros64×16×16×1
Genos16+4×18×1 or 4×216×1 or 8×2

In addition to the “regular” insert DSPs shown in the table, on all models there is an additional “variation” DSP that can be routed as a global send bus, or as an additional insert (on top of what listed in the table, for each program edition).

Uninstallation

To completely remove the program from your computer, you simply have to delete the installation folder (and the desktop icons). Nothing else has been written to your system.